Blog/Archive
Blog archive page is a collection of post grouped by category, author, date and tag etc.
For Blog/Archive Go to Appearance > Customize > Layout > Blog.
You’ll find the following setting under Blog/Archive –
Blog Layout
Grid Layout – Select the number of columns (up to 4) to display your blog posts. From one column to four columns. You can make your first post large.

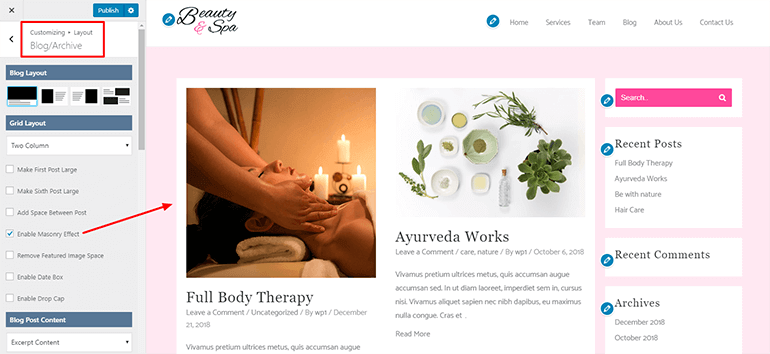
Grid Layout Pro Feature – Select the number of columns (up to 4) to display your blog posts. You can highlight the First Post & Sixth Post. If you want to show your blog post in Masonry grid layout, enable the Masonry Effect to show blog posts.

Right-Align Content blog layout Pro Feature – In this layout, you can show Blog post content in the “right side” and featured image in “left side”. As shown in the below image.

Left-Align Content blog layout Pro Feature – In this layout, you can show Blog post content in the “left side” and featured image in “right side”. As shown in the below image.

Zig-Zag blog layout Pro Feature – In this layout you can show your blog posts in Zig-Zag format with content and featured image just like the below image.

Enable Masonry Effect Pro Feature
A masonry layout is based on columns that display your posts vertically. It will cover all the space and show your post images and content. Width and height are not fixed in Masonry Effect. You can enable this option in Grid Layout. (Layout 1)
Add Space Between Post
You can add space between two blog posts by checking this option.

Remove Featured Image Space
Check this box and remove the padding between the featured images of two blog posts. Use this along “Add Space Between Post” option.

Enable Date Box
This option will allow you to add the date box on the featured image. Here you will get three different styles Circle, Diamond, and Square.

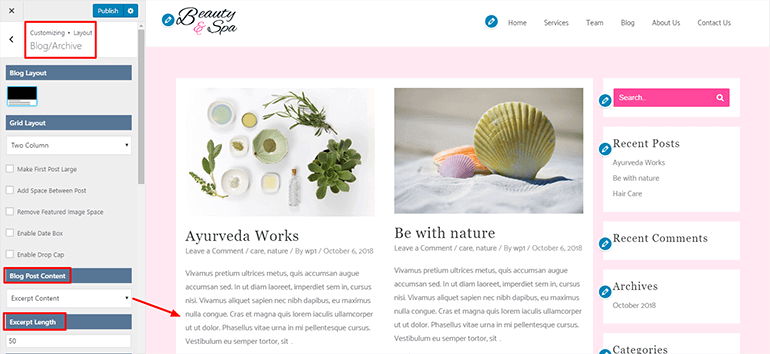
Excerpt length
Excerpt length allows you to set content length you want to show in your blog page.
Read more text
“Read more text” option will allow you to add text on a button under blog post. Just write the content in the field and it will be displayed on your button.

Post Pagination
“Post pagination” will provide you with better navigation for your blog page. You can choose an option between “Numbered”, “Load More” and “Infinite Scroll”.
Numbered – You can add numeric pagination for blog page.
Load more – Choose “Load More” when you reach the bottom of your page you’ll see a Load more button there. Click on that button to load more posts.
Infinite scroll – If you want to show infinite post on your site, select this option it will automatically load new posts when you reach the bottom of a page.

Blog structure
This option will allow you to enable or disable “Featured Image” and “Post Title & Meta”.
Blog Meta
In blog meta you can disable or enable the following elements, These options will work for each post in a page-
- Comment – Hide or show your comment from post by just enabling or disabling eye.
- Category – Using this option you can show or hide category from blog post.
- Publish date – Show or hide the publish date of your post.
- Author – In blog post you can show or hide your author name.

Post meta separator
This option allows you to add separation to the meta tags. In a text field, you can put the desired separator you want to display between.

Blog content width
Blog content width allows you to define the width of the container in your blog page.
If you choose “Default” value then it will automatically take width which is pre-defined. However, you can also add your custom width by just choosing the “Custom” option. As soon as you choose this option it will open a new field to enter your value. Either you can drag the bar to change the width or can enter your value.

Note – Go to dashboard > Reading Settings. You’ll see this option their “Blog pages show at most”. Enter the number of posts you want to show on your blog page.
Outside Space & Inside Space Pro Feature
Add outside & inside space in blog post by adding padding & margin in them. Outside space will add margin in top, bottom, left & right side. Whereas inside space will add padding in top, bottom, left & right side. You can add margin & padding in PX, Em or percentage.

Color & Background Option Pro Feature
For Color & Background option for your blog post, Navigate to this Article.
Still feel any difficulty, Visit to our Support forum.