In this post, I am going to explain multilingual translation for your WordPress website.
First, you have to create a .po, or .mo file and translate these files to your desired languages.
Note : If you already have translated “.po” and “.mo” files then you can skip the Loco translate plugin. And continue from the Polylang plugin installation.
Polylang Loco translate plugin installation :
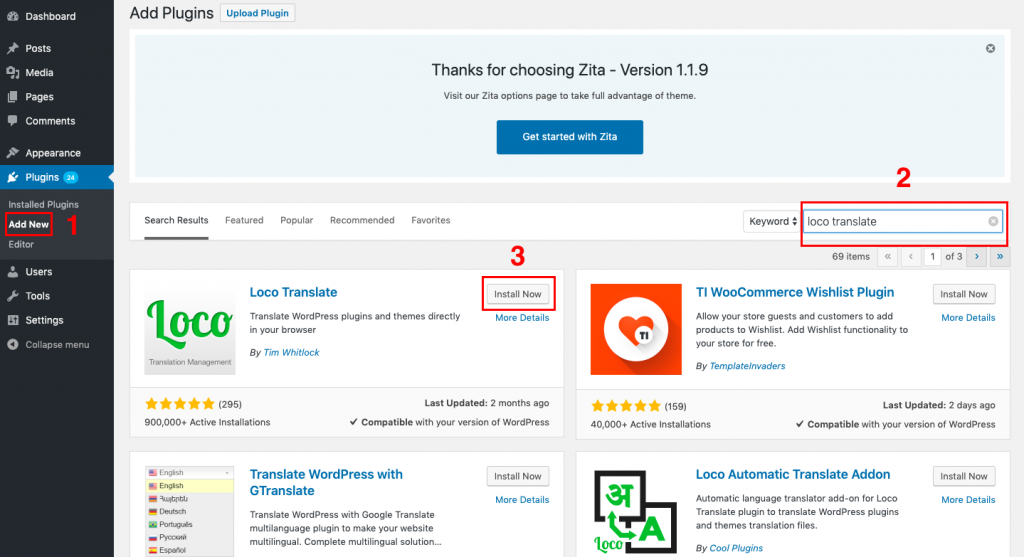
- Download and activate Loco Translate plugin. This plugin helps you to translate the theme’s po file. “.po” file contain theme default strings (like : Leave a comment, Post meta and dashboard backend content etc).
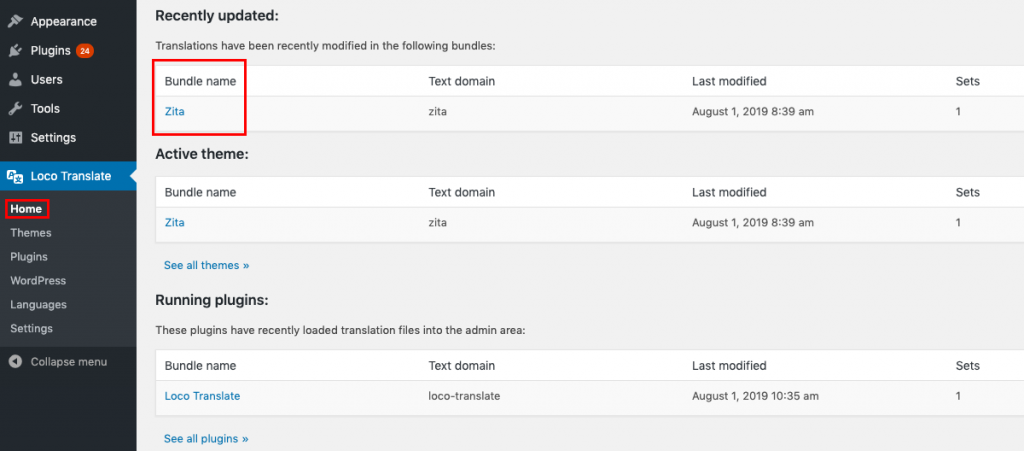
- Now Go to the Dashboard > LOCO Translate > Home.
- Select theme which you want to translate, I have selected Zita WordPress Theme.
- Now click “New Language” and Choose language in which you want to translate your site.
- I have selected “Portuguese (Brazil)” and translated existing English text in “Portuguese” and saved it. This will create “pt_BR.po” and “pt_BR.mo” files automatically in theme language folder.
Task of installing Loco translate plugin has been completed. Now we will continue with Polylang plugin.
Polylang Plugin Installation :
This plugin help you to translate your page, post and frontend content.
- Install and activate Polylang Plugin.

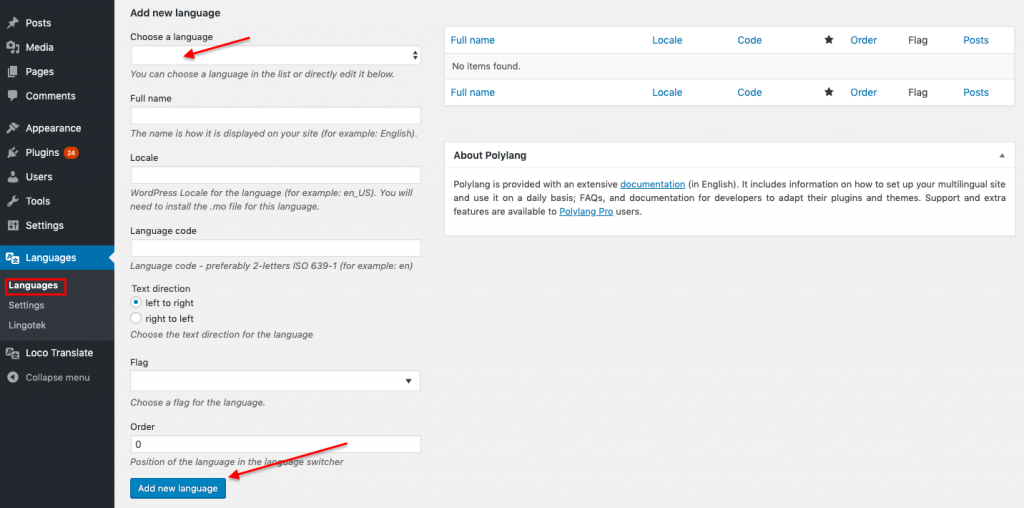
- Now go to the Dashboard > Languages and choose languages in which you want to translate your site. I have added English (Default language) and Portuguese.
- Now go to the Dashboard > String Translation, From here you can translate content which you have added in customize panel.

Note : Customize panel ( Appearance > Customize ) strings will only display here if your theme is coded for that. There are lot of one page WordPress themes which use customize panel to input content for home page. Using string translation you can translate home page of such themes.
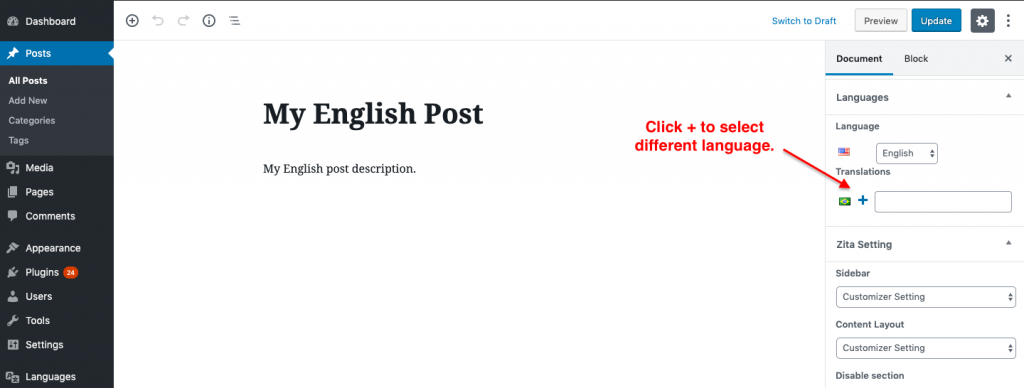
Translate Post :
- To translate post I am going to add text in “English” as well as in my second language “Portuguese”. While writing English post, language should be set to “English”.

- And While writing Portuguese post, language should be set to “Portuguese”. To select another language click “+” available in front of that particular language.
Translate Page :
- To translate page I am going to add text in “English” as well as in my second language “Portuguese”. While writing English page, language should be set to “English”.
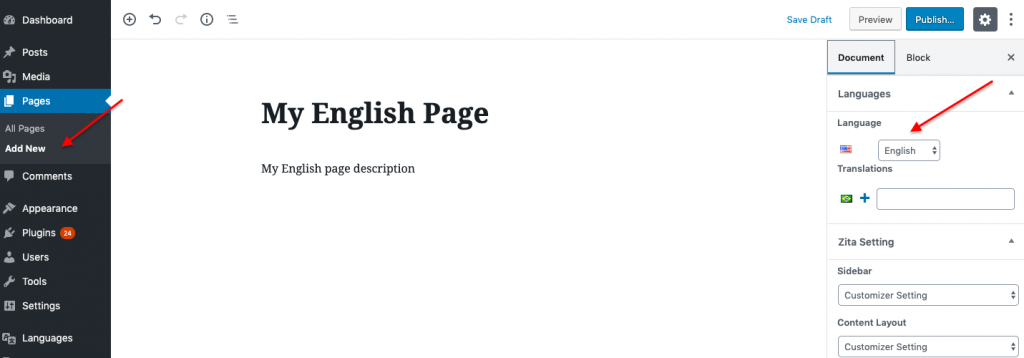
- And While writing Portuguese page, language should be set to “Portuguese”. To select another language click “+” available in front of that particular language.
Translate Menu :
- When you create pages and translate them in multiple languages. Each language create its own separate copy of page. Which you have to use while creating menus. So that separate menus can be displayed for each language. Now you have to add English pages to display under English menu and Portuguese pages to display under Portuguese menu.
- As I have two languages, First i’ll create menu for English. For that navigating to Appearance > Menus > Create Menu, Named it “My English Menu”. Now adding all pages with English content. After adding pages I have to select “Menu Display Location” so selecting “Main English” ( Location name depends on the theme you are using ). This means when English language is selected by visitor from language switcher, My English menus will be displayed.
- In the same way creating one more menu and named it “My Portuguese Menu”. Now adding Portuguese pages and selected “Main Portuguese” as menu display location. And that’s it.
Add Language Switcher :
Now it’s time to add language switcher, Using which your site can be switched to another language according to visitors choice. You can add language switcher in Menu, Sidebar, Footer and in areas where your theme allow widgets.
- Add Language Switcher in Sidebar : Go to the Appearance > Widgets, Drag and drop language switcher in primary or in secondary widget area. How many widget area you have for sidebar depends on your theme.
- Add Language Switcher in Footer : Go to the Appearance > Widgets, Drag and drop language switcher in footer widget area. How many widget area you have for footer depends on your theme.
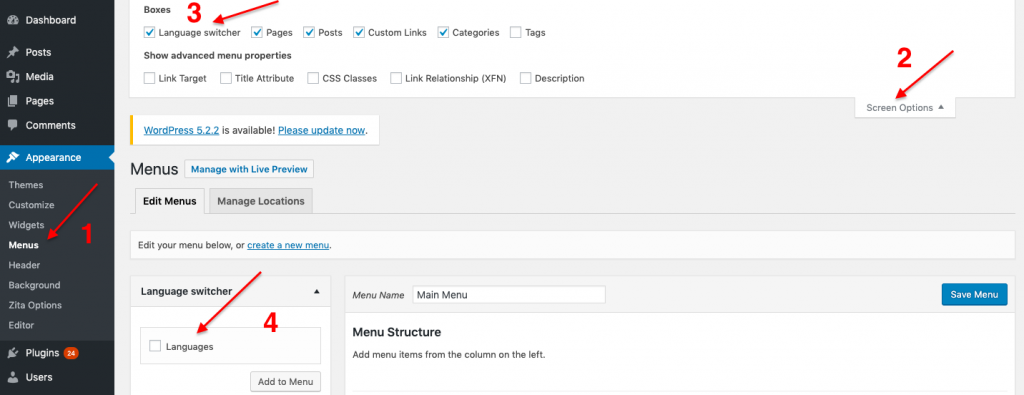
- Add Language Switcher in Menu : For this Go to the Appearance > Menus and add “Languages” menu from “Language Switcher”. If Language Switcher is not visible by default. Then make confirm that you have checked switcher from “Screen Options”.
I hope this article helped you learn how to create multilingual WordPress website. I recommend Zita WordPress theme. This theme 100% compatible with multilingual plugins. To know more about theme features follow this link.
You can also join use here Facebook, Twitter.
Feedback and reviews are welcome in the comments section below. For Support Visit to our Forum.
Read More –